The canvas official guide doesn't work? Well, I am here to save you from frustrations.
I have encountered the SSO configuration issue, despite contacting Instructure there are wasn't any solutions. After days of trying, I have finally identify the issue and resolved the Mircosoft-Canvas SSO Issue.
Pre-requisites
- Canvas does not automatically create user accounts from successful single-sign-ons. User accounts must either be created manually in the web interface or through the SIS import CSVs.
- The login_id field in Canvas must match the selected field returned from Microsoft Entra ID.
- Your organization must have a Microsoft Entra ID subscription.
- You must be able to log in to the admin console for your organization.
- Referencing of <YOURDOMAIN> in this guide is referring to your Canvas URL (ex: https://<YOURDOMAIN>.instructure.com would be https://institution.instructure.com)
Configure Microsoft Entra ID
To configure the integration of Canvas into Microsoft Entra ID you need to add Canvas from the gallery to your list of managed SaaS apps.
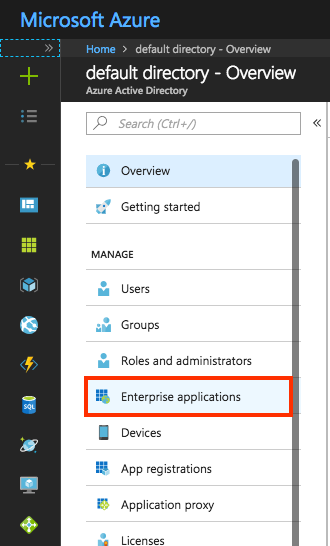
- In the left navigation panel of the Azure portal, click Microsoft Entra ID icon.
- Click the Enterprise applications, then click All applications.

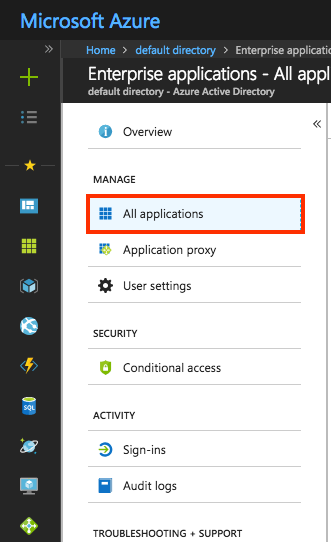
3. To add a new application, click the New application button at the top of the dialog.

4. In the search box, type Canvas [1]. In the results panel, select Canvas [2] and then click the Create button [3] to add the application.

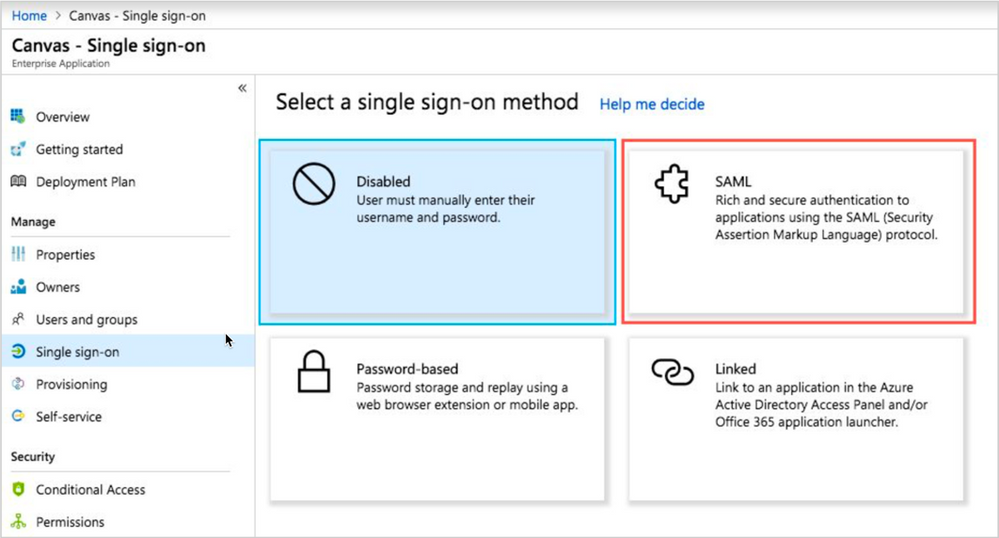
5. In the Canvas | Overview page of the Azure portal, click on Single Sign-on.

6. Click SAML.
7. On the Set up Single Sign-On with SAML page, edit the Basic SAML Configuration section by clicking the pencil in the top-right corner.
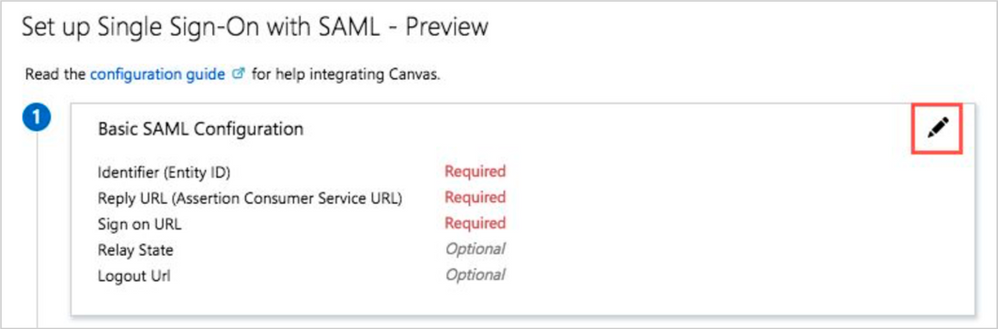
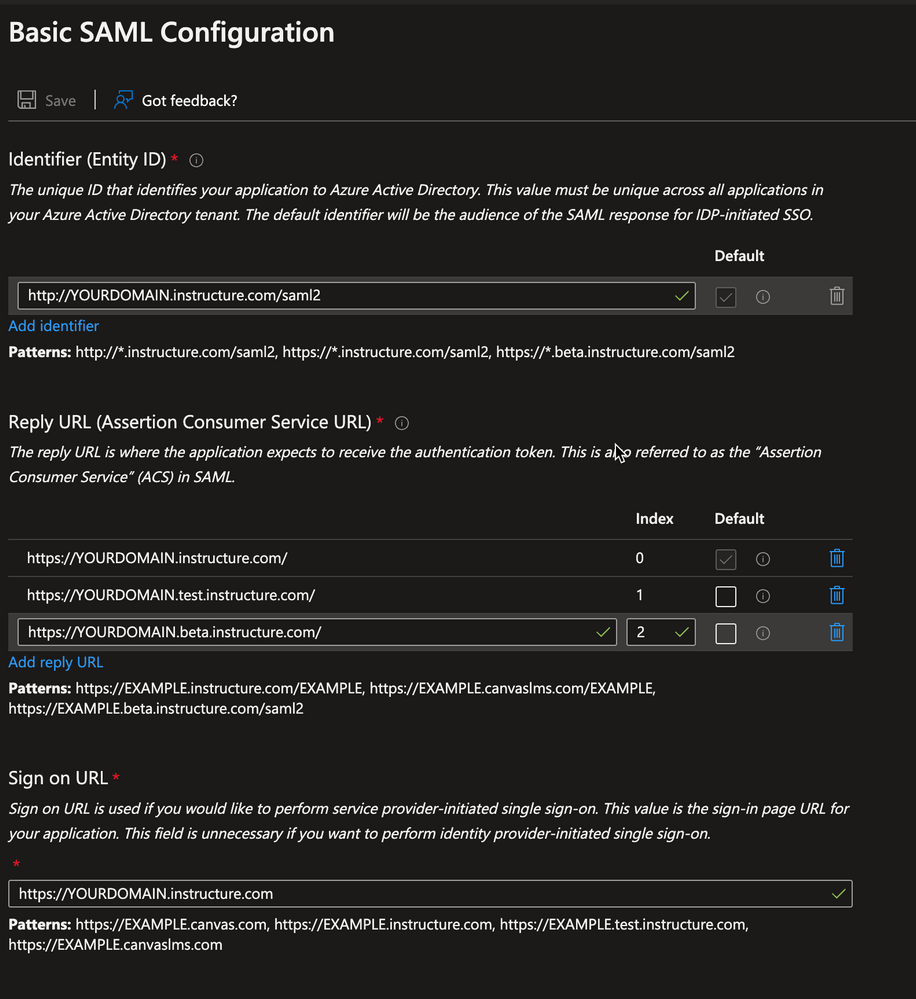
8. Click Add identifier and fill in the Identifier (Entity ID) fields with the Canvas Service Provier Entity ID. Be sure to use http (not https) , your canvas domain, followed by /saml2 (ie. http://<YOURDOMAIN>.instructure.com/saml2 ).
In the Reply URL (Assertion Consumer Service URL) fields, add your Canvas domains (production, test, and beta) (ie. https://<YOURDOMAIN>.instructure.com/* ). Click Add reply URL to create a new input. Examples below:
- https://<YOURDOMAIN>.instructure.com/
- Index: 0
- https://<YOURDOMAIN>.test.instructure.com/
- Index: 1
- https://<YOURDOMAIN>.beta.instructure.com/
- Index: 2
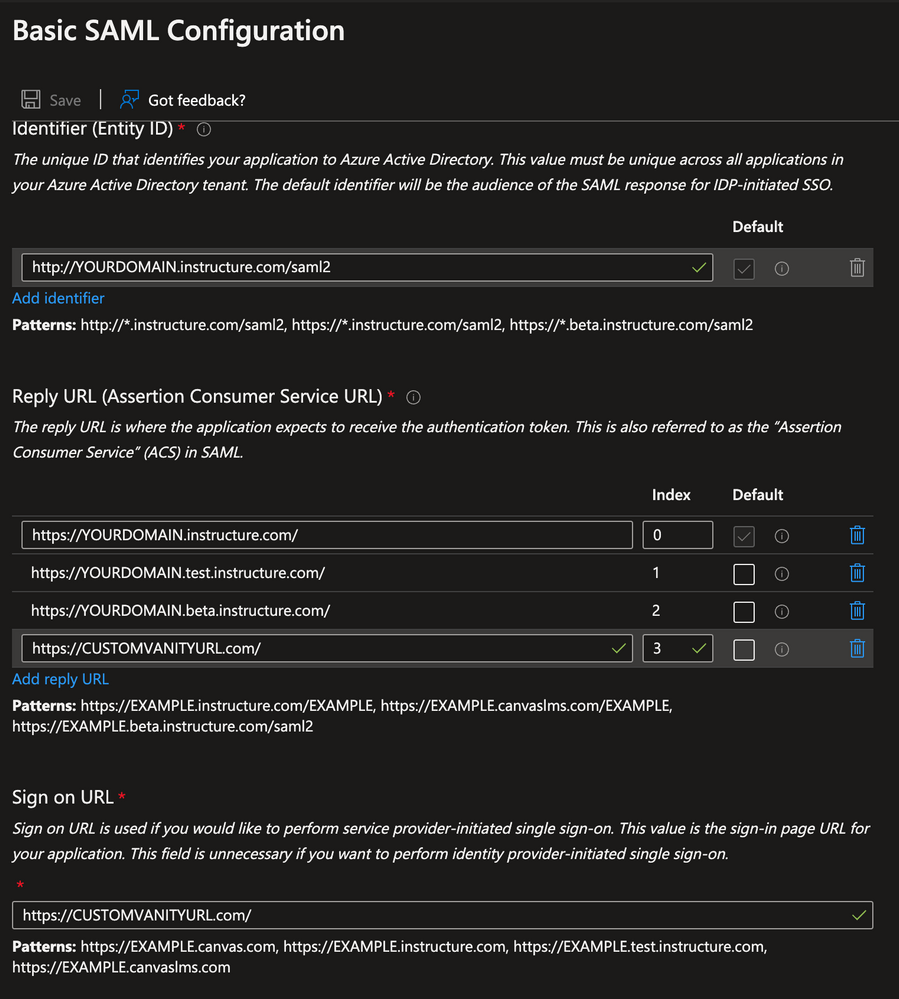
- https://CUSTOMVANITYURL.com/ - You will only use this value if you have a vanity URL with Canvas. If you do not, you will not need to include this value in your configuration.
- Index: 3 (if applicable)
- https://<YOURDOMAIN>.instructure.com/
In the Sign-on URL field, enter your Canvas production URL. This will be https://<YOURDOMAIN>.instructure.com or it will be https://<CUSTOMVANITYURL>.com if you have a vanity URL with Canvas.
Click Save in the top-left corner.
Here is an example if you use a normal Canvas domain:
Here is an example if you use a vanity URL with Canvas:
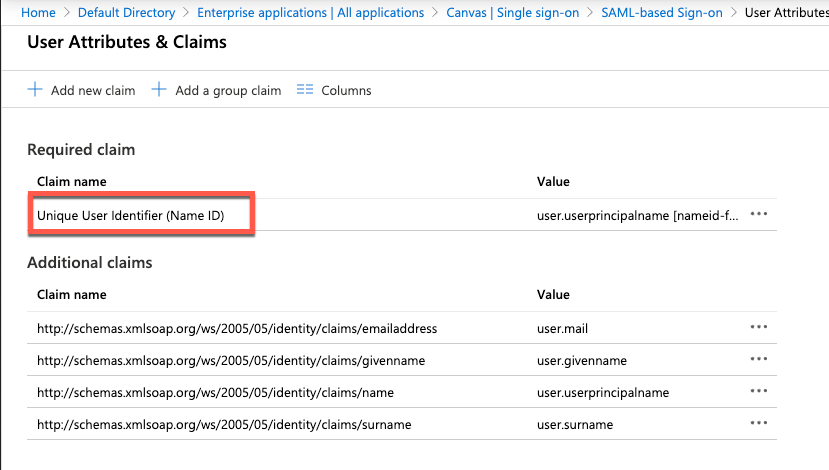
9. Edit the second section, User Attributes & Claims.
***NOTE: This guide walks through the steps of sending the email address as the identifier. If you do not wish to send the email address as the identifier, please select which identifier you would like to send.

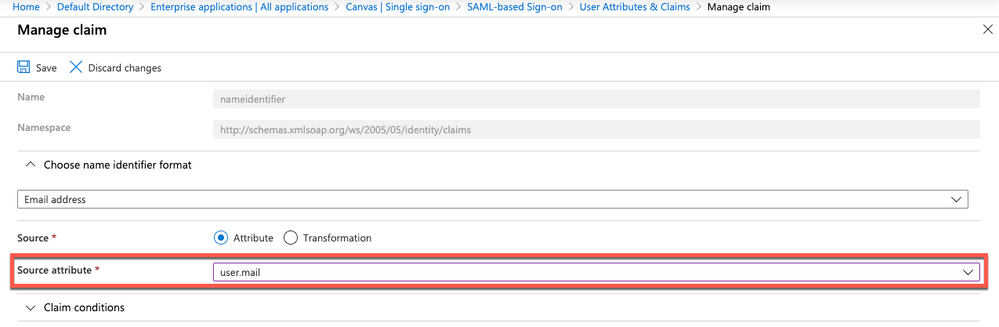
10. Click Unique User Identifier (Name ID) under required claim and change Source attribute to user.mail and click Save.
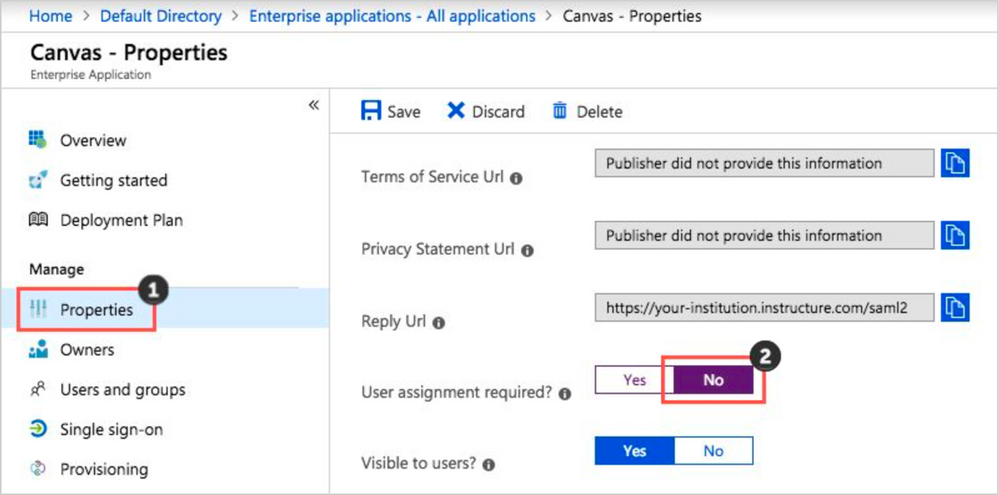
11. Click Properties [1]. Change User assignment required to No [2]. Click Save.
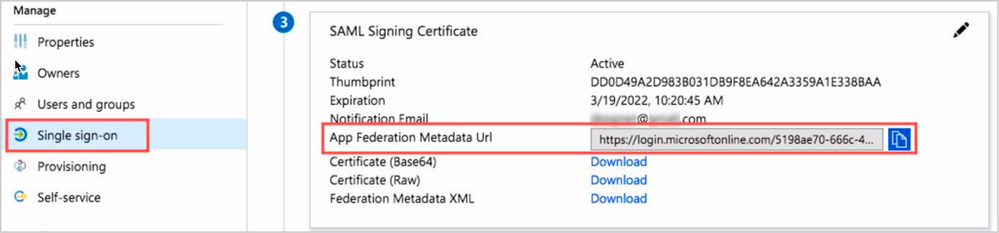
12. Return to the Single Sign-on screen. In the third section, copy the App Federation Metadata Url.
Configure Canvas Authentication
The following steps take place in Canvas (https://YOURDOMAIN.instructure.com).
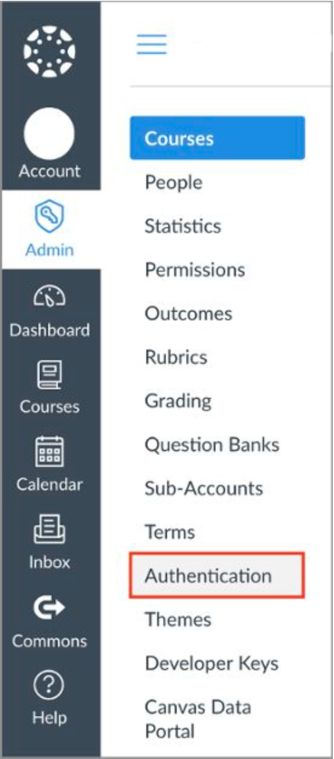
13. In a new browser tab, log in to your Canvas instance as an administrator. From the Admin tile, click Authentication.
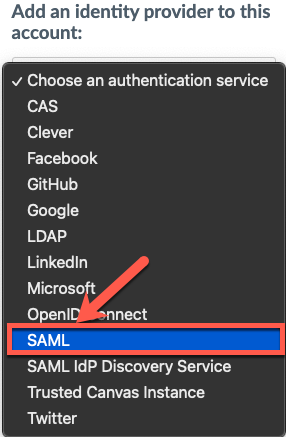
14. Click on the Choose an Authentication Service drop-down, then select SAML.
15. On the SAML configuration page, paste the App Federation Metadata Url into the IdP Metadata URI field. Click Save. Remove IdP Metadata URL after fetching info.
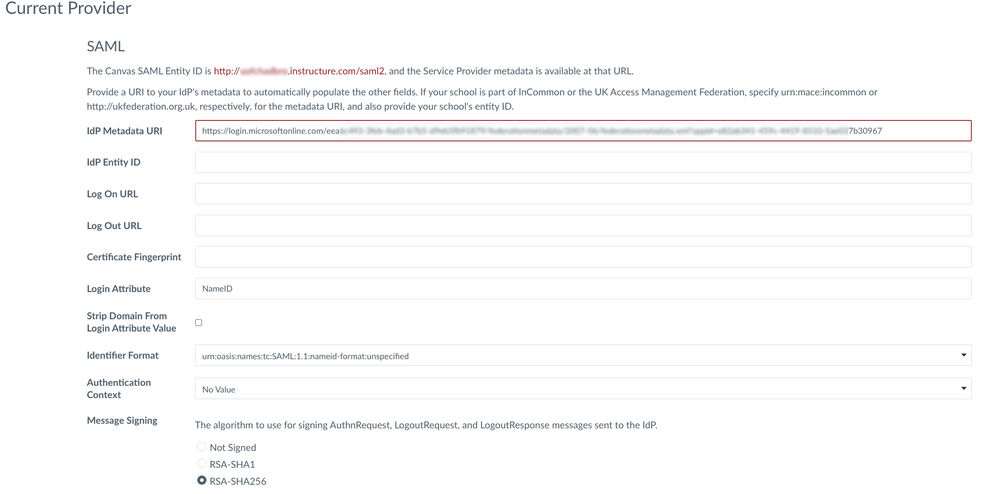
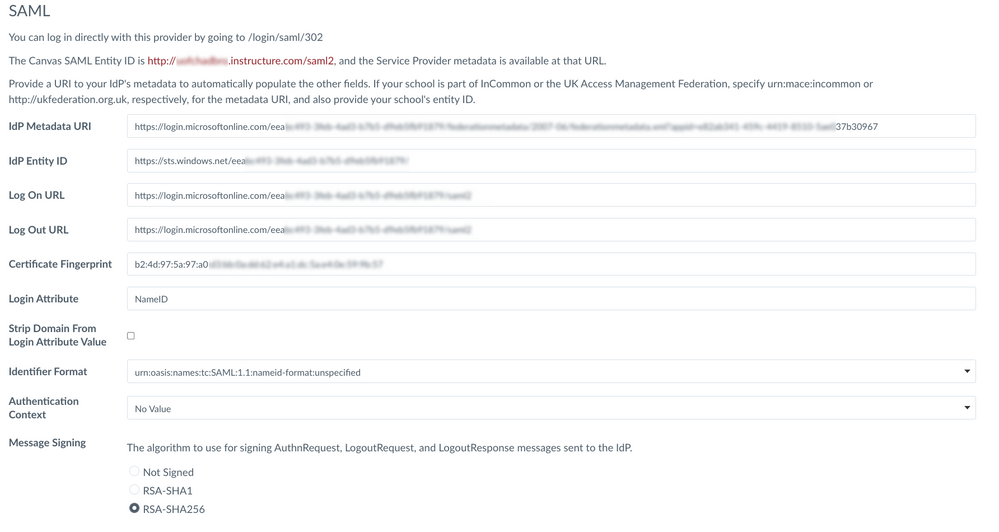
16. The page will reload with the values for IdP Entity ID, Log On URL, Log Out URL and Certificate Fingerprint automatically filled. And lastly you have change the Identifier format to emailAddress and Save. (This is part that cause Microsoft-Canvas SSO issue.)
Identifier Format | urn:oasis:names:tc:SAML:1.1:nameid-format:emailAddress |
17. Test the configuration. Open a new incognito window, and go to
https://<YOURDOMAIN>.instructure.com/login/saml
If successful, you will be prompted to enter your Microsoft email address, followed by your password. You will then be logged in and redirected to your Canvas instance.
***NOTE: Canvas does not automatically create user accounts from successful single-sign-ons. User accounts must either be created manually in the web interface or through the SIS import CSVs.
18. Return to the Authentication screen. To make SAML the primary method for authentication, navigate to the bottom of the SAML section, and change Position to 1. Click Save.

Congratulations! You have configured Microsoft Entra ID inside Canvas LMS.
Quick Checklist:
Microsoft Entra Checklist
Basic SAML Configuration | |
Identifier (Entity ID) | http://<YOURDOMAIN>.instructure.com/saml2 |
Reply URL (Assertion Consumer Service URL) | https://<YOURDOMAIN> [Index 0]
https://<YOURDOMAIN>beta.instructure.com/ [Index 1]
https://<YOURDOMAIN>.test.instructure.com/ [Index 2] |
Sign on URL | https://<YOURDOMAIN>.instructure.com/login/saml |
Relay State (Optional) |
|
Logout Url (Optional) |
Attributes & Claims | |
Unique User Identifier (Name ID) > Name identifier format | Email Address |
Source | Attribute |
Source attribute | user.mail |
SAML Certificates | |
Status | Ensure “Active” |
App Federation Metadata Url | Copy from Microsoft Entra |
Canvas Checklist
App Federation Metadata Url | Remove meta url after fetching info |
Idp Entry ID/Microsoft Entra Identifier | Auto Fetch from Meta URL/ Cross Check Manually |
Log on URL | Auto Fetch from Meta URL/ Cross Check Manually |
Log out URL | Auto Fetch from Meta URL/ Cross Check Manually |
Certificate Fingerprint | Auto Fetch from Meta URL/ Cross Check Manually |
Login Attribute | NameID |
Identifier Format | urn:oasis:names:tc:SAML:1.1:nameid-format:emailAddress |
Message Signing | RSA-SHA 256 |
IMPORTANT Note: User ID must be created before in Canvas with Idp Email Address, Canvas Admin must update their Authentication_provider_id with the idp name (In CSV when creating users or API if admin needs to create later )
